EventBus를 활용한 todoList
2022. 5. 16. 20:53ㆍVue
1. 컴포넌트 만들기
부모 컴포넌트 : @src/views/Todo.vue
자식 컴포넌트 : @src/components/List.vue
자식 컴포넌트 : @src/components/ListAdd.vue
2. 부모 컴포넌트에 자식 컴포넌트들 import하기
3. memo를 적으면 보여지게 하기
ListAdd.vue 에서 메모값을 부모로 $emit 시키기
부모에서는 받은 데이터를 다시 List.vue로 props 전달하기
// ListAdd.vue (자식 컴포넌트)
<template>
  <div>
    <textarea class="form-control"
              id="exampleFormControlTextarea1"
              rows="4"
              v-model="memo">
    </textarea>
    <b-button class="text-left mt-2 d-inline"
              @click="listAdd">할일 추가
    </b-button>
  </div>
</template>

<script>
export default {
  name: "ListAdd",
  data() {
    return {
      memo: null
    }
  },
  methods: {
    listAdd() {
      if (this.memo === null) {
        alert('메모를 입력해주세요')
      } else {
        this.$emit('listAdd', this.memo)
        this.memo = null
      }
    },
  }
}
</script>- v-model="memo"
- 할일 추가 버튼을 누를 때 textarea의 value를 (즉, this.memo) 부모로 전달한다.
- textarea안의 memo는 다시 초기화 시켜주기 위해 null 로 바꿔준다.
// List.vue (부모 컴포넌트)
<template>
  <div class="container">
    <div class="row">
      <div class="col-6">
        <List :todoList="todoList"/>
      </div>
      <div class="col-6">
        <ListAdd @listAdd="listAdd"/>
      </div>
    </div>

  </div>
</template>

<script>
import List from '@/components/List'
import ListAdd from '@/components/ListAdd'

export default {
  name: "Todo",
  components: {
    List,
    ListAdd
  },
  data() {
    return {
      todoList: []
    }
  },
  methods: {
    listAdd(memo) {
      this.todoList.push({memo: memo, status: 'created'})
    }
  }
}
</script>- todoList: [] 배열로 셋팅해 놓는다.
- listAdd로 받은 값을 배열에 객체 형태로 push 한다.
- 객체 안에는 즉 value인 memo와 status 상태값을 속성으로 가진다.
- List컴포넌트 태그에 :todoList="todoList" 로 데이터 값 바인딩한다.
// List.vue (자식 컴포넌트)
<template>
  <div>
    <b-card class="pa-2 mb-2 mr-2"
            v-for="(list, idx) in todoList"
            :key="idx">
      <p>할일 : {{ list.memo }}</p>
    </b-card>
  </div>
</template>

<script>
export default {
  name: "List",
  props: {
    todoList: Array
  }
}
</script>- props에 todoList: Array로 데이타 선언해주고
- v-for문을 카드 태그 형태로 돌려준다.
4. 완료, 부활, 제거 버튼3개 만들기
// List.vue
<template>
  <div>
    <b-card class="pa-2 mb-2 mr-2"
            v-for="(list, idx) in todoList"
            :key="idx"
            :class="{ done: list.status === 'done' }">
      <p>할일 : {{ list.memo }}</p>

      <b-button v-if="list.status === 'created'"
                variant="outline-success"
                @click="completeBtn(idx)">완료
      </b-button>
      <b-button v-if="list.status === 'done'"
                variant="outline-warning"
                @click="restoreBtn(idx)">부활
      </b-button>
      <b-button variant="outline-danger"
                @click="removeBtn(idx)">제거
      </b-button>
    </b-card>
  </div>
</template>

<script>
export default {
  name: "List",
  props: {
    todoList: Array
  },
  methods: {
    completeBtn(idx) {
      this.$emit('complete', idx, 'done')
    },
    restoreBtn(idx) {
      this.$emit('restore', idx, 'created')
    },
    removeBtn(idx) {
      this.$emit('remove', idx)
    }
  }
}
</script>

<style scoped>
.done {
  background-color: rgba(0, 0, 0, 0.1);
}
</style>- 유튜브 보면은 List.vue 파일에서 @click="$emit( 'stateControl', idx, 'done' )" 으로 바로 넘겨주는데 나는 methods로 빼주는 방법을 택했다! 여기서 헤맸던 부분이 @click="compelte(idx)" idx를 매게변수로 넘겨줘야한다 !!!!!!!!!!!!!!!!
- 그리고 :class 속성을 사용하여 if문이 true일 때, bgColor를 줘서 완료 버튼을 누르면 style 적용되게 하기
- v-if로 상태값이 done이면 부활 버튼이 보여지게 하고, created면 완료 버튼이 보여지게 한다.
// Todo.vue (부모 컴포넌트)
<template>
  <div class="container">
    <div class="row">
      <div class="col-6">
        <List :todoList="todoList"
              @complete="complete"
              @restore="restore"
              @remove="remove"/>
      </div>
      <div class="col-6">
        <ListAdd @listAdd="listAdd"
                 @listEdit="listEdit"/>
      </div>
    </div>

  </div>
</template>

<script>
import List from '@/components/List'
import ListAdd from '@/components/ListAdd'

export default {
  name: "Todo",
  components: {
    List,
    ListAdd
  },
  data() {
    return {
      todoList: []
    }
  },
  methods: {
    listAdd(memo) {
      this.todoList.push({memo: memo, status: 'created'})
    },
    complete(idx, status) {
      this.todoList[idx].status = status
    },
    restore(idx, status) {
      this.todoList[idx].status = status
    },
    remove(idx) {
      this.todoList.splice(idx, 1)
    }
  }
}
</script>- <List> 컴포넌트에 @complete="complete" 완료, 부활, 제거 데이터 받아온다.
- methods에서는 완료 / 부활 : 배열의 인덱스의 상태 값은 = status로 담아준다!
- 제거 버튼은 splice를 써서 해당 인덱스 하나 지우게 해준다.
4. 수정 버튼을 2개 만든다. (List, ListAdd)
// List.vue (자식 컴포넌트)
<template>
  <div>
    <b-card class="pa-2 mb-2 mr-2"
            v-for="(list, idx) in todoList"
            :key="idx"
            :class="{ done: list.status === 'done' }">
      <p>할일 : {{ list.memo }}</p>

      <b-button v-if="list.status === 'created'"
                variant="outline-success"
                @click="completeBtn(idx)">완료
      </b-button>
      <b-button v-if="list.status === 'done'"
                variant="outline-warning"
                @click="restoreBtn(idx)">부활
      </b-button>
      <b-button variant="outline-danger"
                @click="removeBtn(idx)">제거
      </b-button>
      <b-button v-if="list.status === 'created'"
                variant="outline-info">수정
      </b-button>
    </b-card>
  </div>
</template>

<script>
export default {
  name: "List",
  props: {
    todoList: Array
  },
  methods: {
    completeBtn(idx) {
      this.$emit('complete', idx, 'done')
    },
    restoreBtn(idx) {
      this.$emit('restore', idx, 'created')
    },
    removeBtn(idx) {
      this.$emit('remove', idx)
    }
  }
}
</script>

<style scoped>
.done {
  background-color: rgba(0, 0, 0, 0.1);
}
</style>
// ListAdd.vue (자식 컴포넌트)
<template>
<div>
<textarea class="form-control"
id="exampleFormControlTextarea1"
rows="4"
v-model="memo">
</textarea>
<b-button class="text-left mt-2 d-inline"
v-if="this.mode === 'add'"
@click="listAdd">할일 추가
</b-button>
<b-button class="text-left mt-2 d-inline"
v-else>할일 수정
</b-button>
</div>
</template>
<script>
export default {
name: "ListAdd",
data() {
return {
memo: null
}
},
methods: {
listAdd() {
if (this.memo === null) {
alert('메모를 입력해주세요')
} else {
this.$emit('listAdd', this.memo)
this.memo = null
}
},
}
}
</script>
쟈쟈 다왔다! 이제 대망의 핵심 EventBus를 활용해 보도록 하즈아!
5. EventBus 활용하여 수정 버튼 기능 구현하기
일단, 강의에서는 main.js에 eventBus를 만든다.
// main.js
export const eventBus = new Vue({
  methods: {
    listEdit(memo, idx) {
      this.$emit('listEdit', memo, idx)
    }
  }
})
// List.vue (자식 컴포넌트)
<template>
<div>
<b-card class="pa-2 mb-2 mr-2"
v-for="(list, idx) in todoList"
:key="idx"
:class="{ done: list.status === 'done' }">
<p>할일 : {{ list.memo }}</p>
<b-button v-if="list.status === 'created'"
variant="outline-success"
@click="completeBtn(idx)">완료
</b-button>
<b-button v-if="list.status === 'done'"
variant="outline-warning"
@click="restoreBtn(idx)">부활
</b-button>
<b-button variant="outline-danger"
@click="removeBtn(idx)">제거
</b-button>
<b-button v-if="list.status === 'created'"
variant="outline-info"
@click="listEdit(list.memo, idx)">수정
</b-button>
</b-card>
</div>
</template>
<script>
import {eventBus} from "../main"
export default {
name: "List",
props: {
todoList: Array
},
methods: {
completeBtn(idx) {
this.$emit('complete', idx, 'done')
},
restoreBtn(idx) {
this.$emit('restore', idx, 'created')
},
removeBtn(idx) {
this.$emit('remove', idx)
},
listEdit(memo, idx) {
// 이벤트버스의 listEdit한테 값을 넘겨 줌
eventBus.listEdit(memo, idx)
}
}
}
</script>
<style scoped>
.done {
background-color: rgba(0, 0, 0, 0.1);
}
</style>// ListAdd.vue (자식 컴포넌트)
<template>
<div>
<textarea class="form-control"
id="exampleFormControlTextarea1"
rows="4" v-model="memo">
</textarea>
<b-button class="text-left mt-2 d-inline"
v-if="this.mode === 'add'"
@click="listAdd">할일 추가
</b-button>
<b-button class="text-left mt-2 d-inline"
v-else
@click="listEdit">할일 수정
</b-button>
</div>
</template>
<script>
import {eventBus} from "../main"
export default {
name: "ListAdd",
data() {
return {
memo: null,
idx: null,
mode: 'add'
}
},
created() {
// 수정 버튼 누르면 수정할 수 있게 memo 데이터 넘겨줌
eventBus.$on('listEdit', (memo, idx) => {
this.memo = memo
this.idx = idx
this.mode = 'edit'
})
},
methods: {
listAdd() {
if (this.memo === null) {
alert('메모를 입력해주세요')
} else {
this.$emit('listAdd', this.memo)
this.memo = null
}
},
listEdit() {
if (this.memo === null) {
alert('메모를 입력해주세요.')
} else {
this.$emit('listEdit', this.memo, this.idx)
this.memo = null
this.mode = 'add'
}
}
}
}
</script>// Todo.vue (부모 컴포넌트)
<template>
<div class="container">
<div class="row">
<div class="col-6">
<List :todoList="todoList"
@complete="complete"
@restore="restore"
@remove="remove"/>
</div>
<div class="col-6">
<ListAdd @listAdd="listAdd"
@listEdit="listEdit"/>
</div>
</div>
</div>
</template>
<script>
import List from '@/components/List'
import ListAdd from '@/components/ListAdd'
export default {
name: "Todo",
components: {
List,
ListAdd
},
data() {
return {
todoList: []
}
},
methods: {
listAdd(memo) {
this.todoList.push({memo: memo, status: 'created'})
},
complete(idx, status) {
this.todoList[idx].status = status
},
restore(idx, status) {
this.todoList[idx].status = status
},
remove(idx) {
this.todoList.splice(idx, 1)
},
listEdit(memo, idx) {
this.todoList[idx].memo = memo
}
}
}
</script>- List.vue 의 수정버튼 누르면 value값 > eventbus > ListAdd.vue의 textarea 에 나타나게 한다.
- ListAdd.vue에서 글을 쓰고 수정 버튼 누르면 value값이 > eventbus > List.vue에 바뀌게 한다.
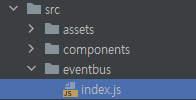
5. 전역 EventBus를 활용해보기
src 폴더 안에 eventbus > index.js 파일을 만든다.
// eventbus폴더의 > index.js
import Vue from 'vue'
const EventBus = new Vue()
export default EventBus
// Todo.vue (부모 컴포넌트)
<template>
  <div class="container">
    <div class="row">
      <div class="col-6">
        <List :todoList="todoList"
              @complete="complete"
              @restore="restore"
              @remove="remove"/>
      </div>
      <div class="col-6">
        <ListAdd @listAdd="listAdd"
                 @listEdit="listEdit"/>
      </div>
    </div>

  </div>
</template>

<script>
import List from '@/components/List'
import ListAdd from '@/components/ListAdd'
export default {
  name: "Todo",
  components: {
    List,
    ListAdd
  },
  data() {
    return {
      todoList: []
    }
  },
  methods: {
    listAdd(memo) {
      this.todoList.push({memo: memo, status: 'created'})
    },
    complete(idx, status) {
      this.todoList[idx].status = status
    },
    restore(idx, status) {
      this.todoList[idx].status = status
    },
    remove(idx) {
      this.todoList.splice(idx, 1)
    },
    listEdit(memo, idx) {
      this.todoList[idx].memo = memo
    }
  }
}
</script>// List.vue (자식컴포넌트)
<template>
<div>
<b-card class="pa-2 mb-2 mr-2"
v-for="(list, idx) in todoList"
:key="idx"
:class="{ done: list.status === 'done' }">
<p>할일 : {{ list.memo }}</p>
<b-button v-if="list.status === 'created'"
variant="outline-success"
@click="completeBtn(idx)">완료
</b-button>
<b-button v-if="list.status === 'done'"
variant="outline-warning"
@click="restoreBtn(idx)">부활
</b-button>
<b-button variant="outline-danger"
@click="removeBtn(idx)">제거
</b-button>
<b-button v-if="list.status === 'created'"
variant="outline-info"
@click="listEdit(list.memo, idx)">수정
</b-button>
</b-card>
</div>
</template>
<script>
import EventBus from '@/eventbus'
export default {
name: "List",
props: {
todoList: Array
},
methods: {
completeBtn(idx) {
this.$emit('complete', idx, 'done')
},
restoreBtn(idx) {
this.$emit('restore', idx, 'created')
},
removeBtn(idx) {
this.$emit('remove', idx)
},
listEdit(memo, idx) {
EventBus.$emit('listEdit', memo, idx)
}
}
}
</script>
<style scoped>
.done {
background-color: rgba(0, 0, 0, 0.1);
}
</style>- 자식컴포넌트 2개 EventBus import하기
- listEdit 메소드를 통해 이벤트를 발행시킴
// ListAdd.vue (자식 컴포넌트)
<template>
  <div>
    <textarea class="form-control"
              id="exampleFormControlTextarea1"
              rows="4"
              v-model="memo">
    </textarea>
    <b-button class="text-left mt-2 d-inline"
              v-if="this.mode === 'add'"
              @click="listAdd">할일 추가
    </b-button>
    <b-button class="text-left mt-2 d-inline"
              @click="listEdit"
              v-else>할일 수정
    </b-button>

  </div>
</template>

<script>
import EventBus from '@/eventbus'

export default {
  name: "ListAdd",
  data() {
    return {
      memo: null,
      idx: null,
      mode: 'add'
    }
  },
  created() {
    EventBus.$on('listEdit', (memo, idx) => {
      this.memo = memo
      this.idx = idx
      this.mode = 'edit'
    })
  },
  methods: {
    listAdd() {
      if (this.memo === null) {
        alert('메모를 입력해주세요')
      } else {
        this.$emit('listAdd', this.memo)
        this.memo = null
      }
    },
    listEdit () {
      if (this.memo === null) {
        alert('메모를 입력해주세요')
      } else {
        this.$emit('listEdit', this.memo, this.idx)
        this.memo = null
        this.mode = 'add'
      }
    }
  }
}
</script>- created 훅 에서는 List.vue 에서 수정버튼 누르는 순간!! ListAdd.vue의 textarea 에 값이 바인딩된다!
- created에서 EventBus.$on으로 값을 받아 오기 때문이다.
- ListAdd.vue 에서 수정버튼을 누르면 데이터값을 다시 List.vue에 넘겨줘야한다.
이벤트 발행($emit)
Event Bus를 생성했으니, 데이터를 전달할 이벤트를 호출(생성)해주어야한다.
$emit 을 이용하여 이벤트 이름과 데이터를 포함시켜 내보냄
EventBus.$emit("이벤트 이름", 전달하는 데이터 or 값);이벤트 등록($on)
이벤트를 호출(생성)했으니 데이터를 사용하고 싶은 곳에서 원하는 이벤트를 등록해주어야한다.
$on 메소드를 이용하여 첫번째 파라미터 에는 이벤트 이름, 두번째 파라미터 에는 콜백함수를 지정해준다.
(이벤트를 한번만 받아보고 싶은 경우에는 $on대신 $once 를 사용하면 된다.)
EventBus.$on("pushData", payload => {
      this.pushedData = payload[0];
      this.newTitle = payload[0].title;
    });
'Vue' 카테고리의 다른 글
| selectbox 선택한 값 보여지게 하기 (0) | 2022.06.28 |
|---|---|
| [vue] 모달창 띄우기 (0) | 2022.06.10 |
| postman (0) | 2022.05.02 |
| Kakao login / map api (0) | 2022.04.28 |
| vue-fontawesome (0) | 2022.04.27 |